a. Create a Cluster

In this section we’re going to use ParallelCluster UI to create a cluster from a sample template we’ve provided.
You can take your pick of either the p4d.24xlarge, p4de.24xlarge (80GB version) or the p5.48xlarge instance, all NVIDIA based instances with the following specs:
| Instance Size | Cores | Memory (GiB) | GPU | GPU memory | GPUDirect RDMA | GPU Peer to Peer | On-demand Price/hr | Cluster Config |
|---|---|---|---|---|---|---|---|---|
| p4d.24xlarge | 96 | 1152 | 8 x A100 | 320 GB HBM2 | Yes | 600 GB/s NVSwitch | $32.77 | Download Template |
| p4de.24xlarge | 96 | 1152 | 8 x A100 | 640 GB HBM2 | Yes | 600 GB/s NVSwitch | $40.96 | Download Template |
| p5.48xlarge | 192 | 2 TB | 8 x H100 | 640 GB HBM3 | Yes | 900 GB/s NVSwitch | $98.32 | Download Template |
-
Click Create Cluster > Select With a template. You’ll be prompted to provide a file, download the template linked in the table above and select that file.
-
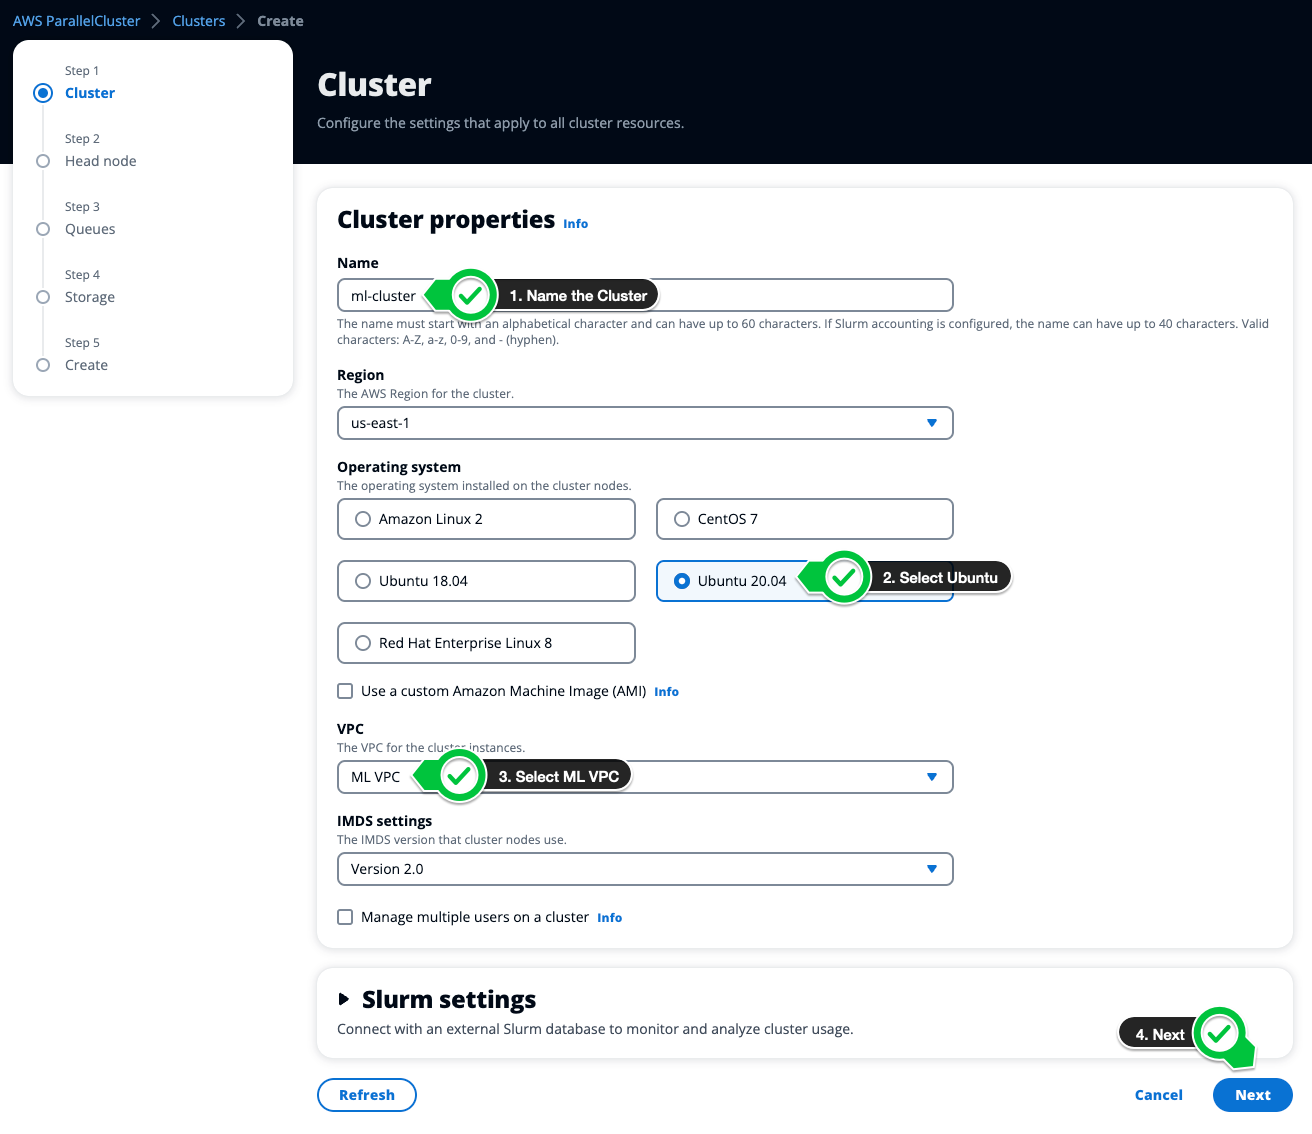
On the Cluster page fill out the following:
- Name the cluster ml-cluster (or whatever you want to name it)
- Select Ubuntu 20.04
- Select the VPC,
ML VPCcreated in b. Create VPC
On the next few screens, we’ll modify the account specific components and leave the rest as specified by the template.
-
On the Head node page we’ll set the following:
- Set the Head node instance type, we recommend leaving the default
c5.xlarge - Select a public Subnet from
ML VPCcreated in b. Create VPC. This should be in the same Availability Zone as your capacity. - Optionally set the Keypair to None, we’ll add a key later in C. Connect to the Cluster
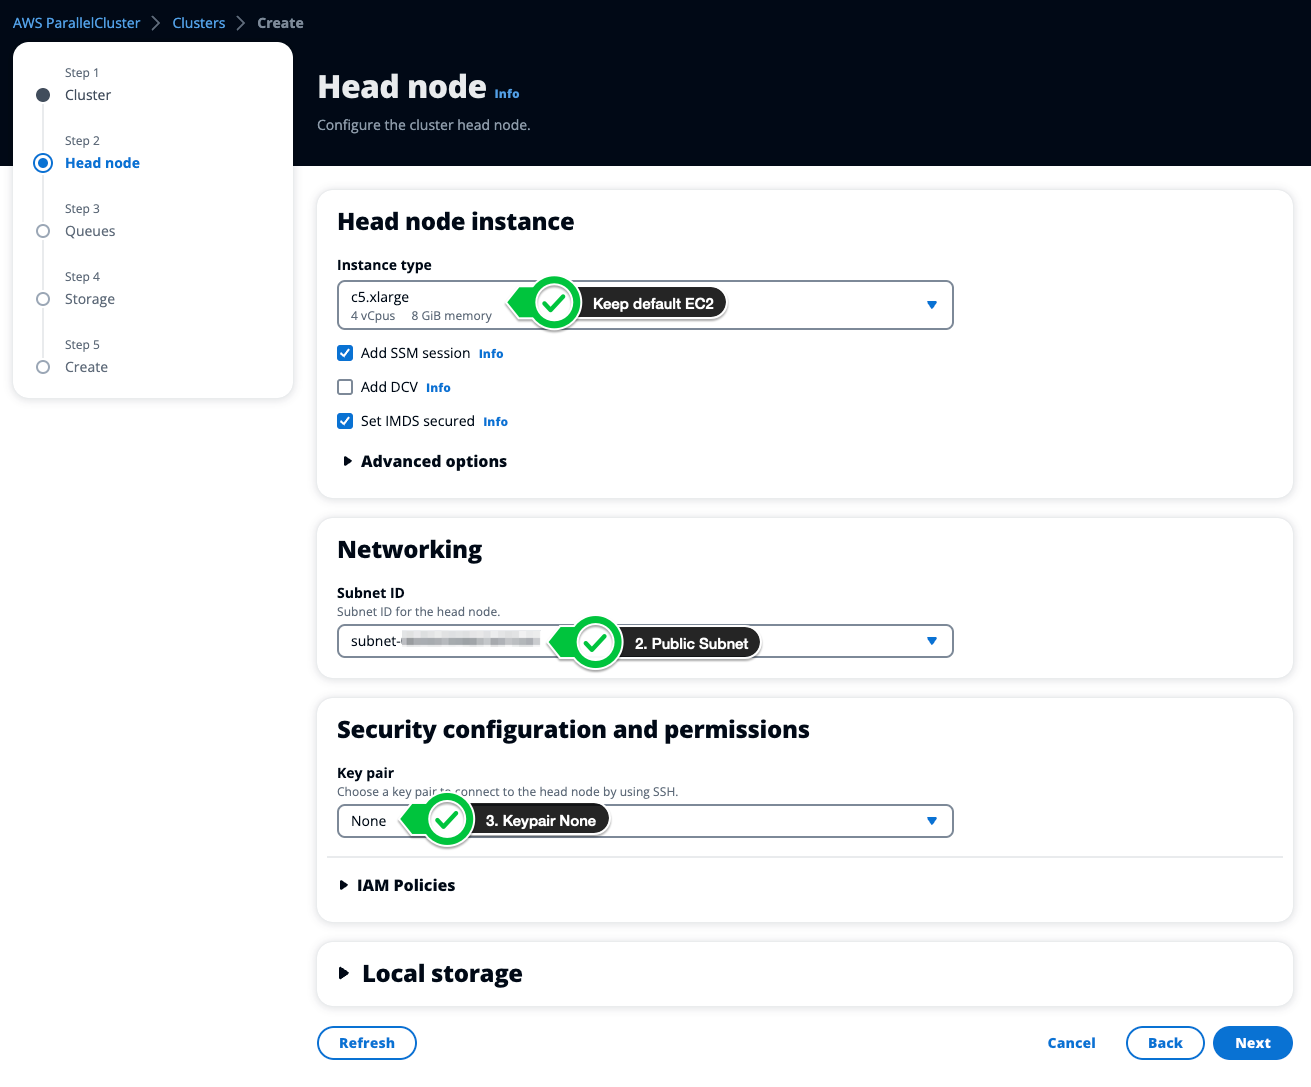
- Set the Head node instance type, we recommend leaving the default
-
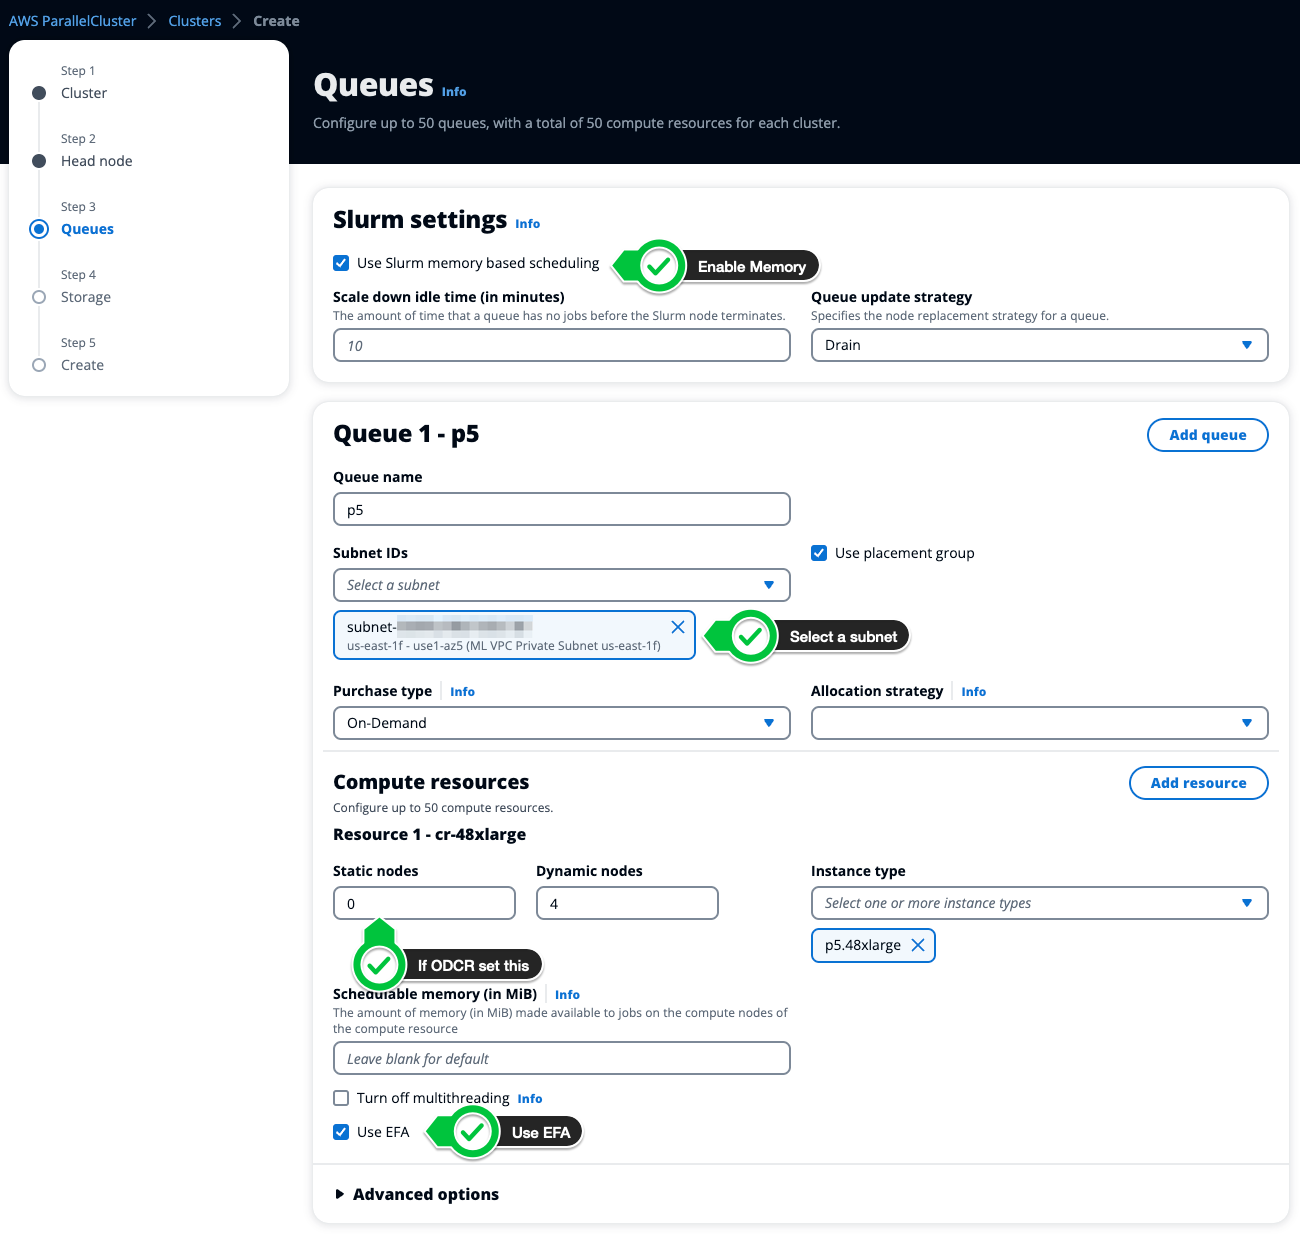
On the Queues page we’ll leave most things as default making sure that:
- Memory based scheduling is Enabled
- The subnet is the Private Subnet from the ML VPC
- The GPU Instance type is correct (from the template)
- EFA is enabled
-
Keep the defaults on the storage tab and click Next
-
Set the AMI Id of the Custom Image we created previously. This has to be done directly in the yaml file in the Image section like so:
Image:
    Os: ubuntu2004
    CustomAmi: ami-0528af10692058c25 # <= add this line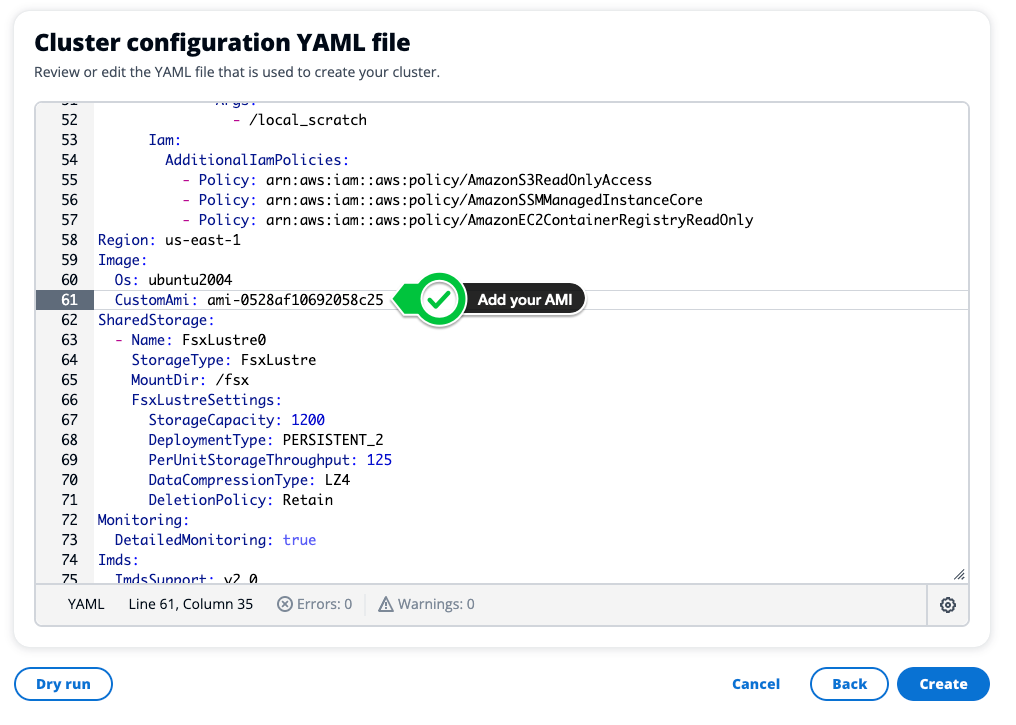
-
Proceed to the next page to configure your Capacity Reservation.